Menu
close

Let's get you uploading high quality and optimised Instagram reels. It's not hard, but there are a few hidden tricks and tips that we've found over the past few years of creating content for social media. So keep on reading because this is how we get the best export settings for Instagram reels in Final Cut.
But before we start, who are we and why would you trust us?
Live To Create is a content creation studio. We live and breathe creation and all things social (pun intended); and over the past two years, the content we've created for ourselves and our clientele has been viewed by MILLIONS of people.
So open up Final Cut Pro and have your phone by your side, because throughout this blog we will be stepping you through our process of exporting, uploading and optimising high quality reels.
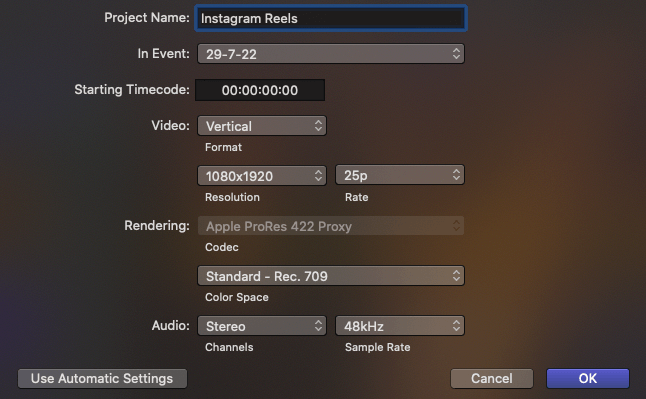
Instagram Reels are typically in the 16:9 ratio. Upon creating a new project in Final Cut Pro, be sure to set it up as follows:

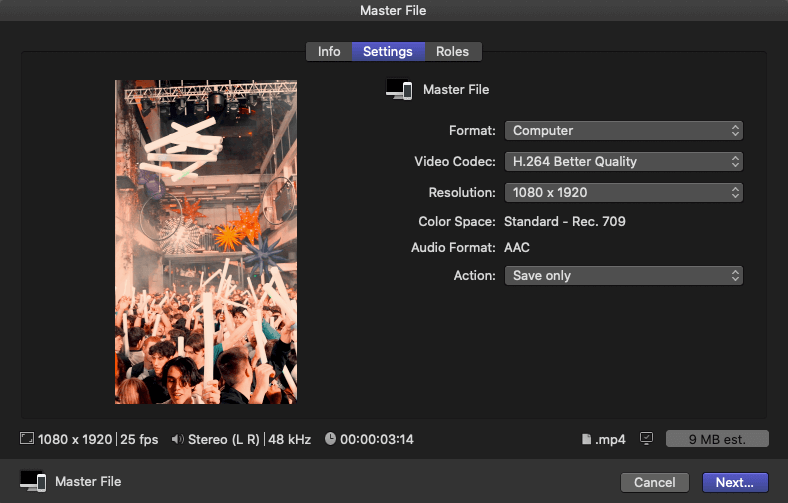
The bitrate and best export settings for Instagram reels in Final Cut is MP4, and upon exporting, be sure the following settings are:

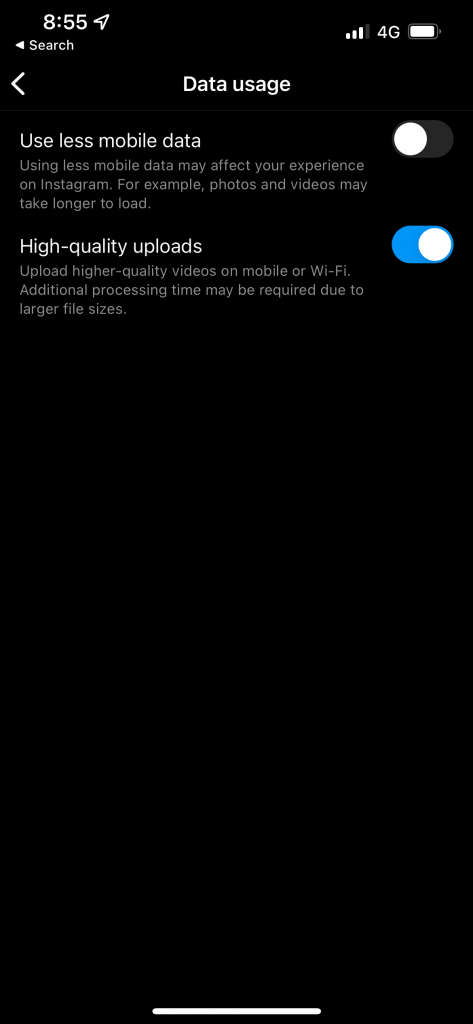
After exporting your reel from Final Cut with the recommended settings above, you will need to turn on uploading in high quality on Instagram. Head to your Instagram settings > Account > Data Usage > Switch "High-quality uploads" on.

It's as simple as that! With just a few settings, the videos you upload to Instagram will be ultra sharp and optimised.
If you want to stay tuned about future blog articles, be sure sure to sign up to our newsletter! We have so many amazing topics around content creation & social media to come.
As always, be sure to let us know how you go! Tag as @livetocreateau.
If you want to help editing your content, get in contact with us for a free 15 minute introduction chat!
The Live To Create team.

